Operating modes
Setting the cutting depth (see figure C)
- Adapt the cutting depth to the thickness of the workpiece. A space of less than the height of one full tooth should be visible under the workpiece.
Loosen the clamping lever (19). For a smaller cutting depth, pull the saw away from the base plate (8); for a larger cutting depth, push the saw towards the base plate (8). Adjust the desired cutting depth at the cutting-depth scale. Retighten the clamping lever (19).
Adjusting the mitre/bevel angle
We recommend that you place the power tool down on the front side of the protective guard (6).
Loosen the adjusting lever for mitre/bevel angle preselection (17). Swivel the saw to the side. Set the required mitre/bevel angle on the scale (14). Screw the adjusting lever (17) back on again.
Note: When making mitre cuts, the cutting depth is less than the value shown on the cutting depth scale (5).
Cut Marks
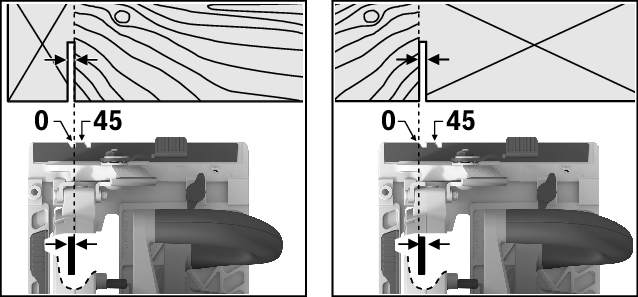
The 0° cut mark (12) indicates the position of the saw blade when making a right-angled cut. The 45° cut mark (13) indicates the position of the saw blade when making a 45° cut.
For a precise cut, place the circular saw against the workpiece as shown in the figure. We recommend making a test cut.